Introduction
This geospatial lab exercise was an introduction to using Workforce for ArcGIS, an online GIS tool used to create and manage the completion of various projects. This introduction to Workforce was based off of the ESRI Workforce tutorial, "Manage Hydrant Inspections" where the user creates a hypothetical project to inspect fire hydrants in the San Diego area. This tutorial was broken into a variety of sections, each with their own goals and end products. These sections included "Create and configure a Workforce project," "Dispatch inspection assignments," "Prepare the firefighters," "Inspect a hydrant," and finally the optional "Complete additional inspections" to gain more experience. The completion of this ESRI tutorial allows for the user to gain valuable experience with Workforce for ArcGIS and some minor experience with Navigator for ArcGIS.
Methods
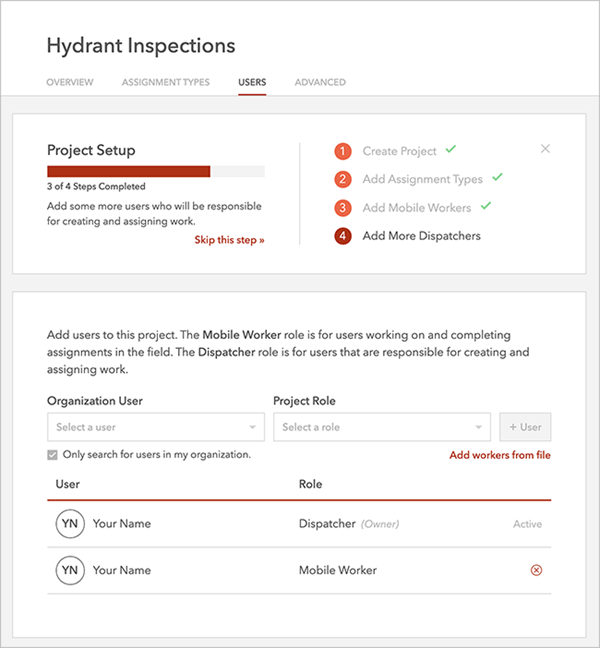
To begin this exercise, we first launched Workforce for ArcGIS and began by creating a project with the provided set up info. This info provided through the tutorial for the basic setup of our first project included info on a title and summary of the project, adding assignment types of work, and creating various roles such as dispatcher and mobile worker.
Figure 1. Project setup window
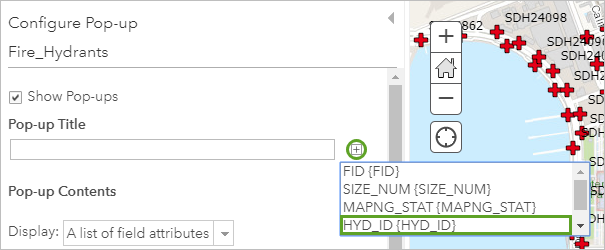
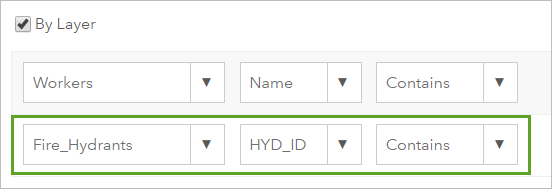
With the project set up with users and tasks to get done, the next step was to customize the map for the tasks at hand. This was done by launching the map window within Workforce and adding the ESRI provided data on San Diego fire hydrants. With this done, we added pop up labels to each of the hydrants to aid in visual navigation. This was also done in the worker view of the map to allow field workers to look up hydrants by hydrant number to navigate to whichever hydrant needed maintaining.
Next, we made sure that this project and its tasks were visible and accessible to the mobile workers who would be completing said tasks. This was done by making sure Navigator for ArcGIS was integrated to Workforce. This allows for the mobile workers to navigate to whichever hydrant needs inspecting.
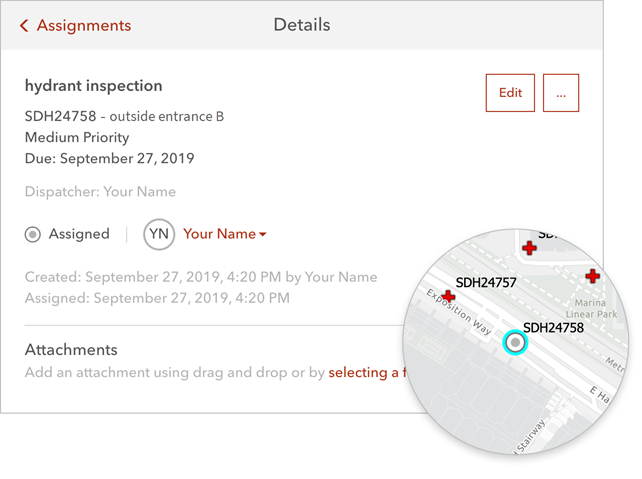
Back on the main page, the next step was to create assignments for the field workers to accomplish. To do this, the "Create Assignment" menu was opened and provided info from the tutorial was inputted. This includes the task which was hydrant inspection, a note on the location of the hydrant, the priority level, when this task is due by, and which worker it was assigned too. At this point, I also created optional additional assignments to gain more experience in the various settings and inputs that can be added to an assignment. These include images, higher or lower levels of priority, or even leaving certain fields of information blank.
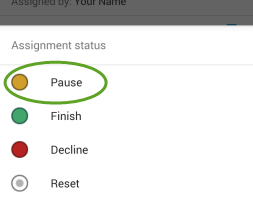
With this done, the final section of this tutorial was to launch the Workforce for ArcGIS app and complete some of the assignments we had created earlier. Downloading the app to my phone and logging in, I am able to see all of the assignments that I created earlier as well as a map of the area where the tasks are located. Clicking on one of the tasks, I am able to "Start" which allows the dispatcher to see where the workers are and what tasks are getting done. Also on this menu, you can pause the task and create a note to let the dispatcher know why you are pausing the assignment as well as finish the task once it is done. Within the main menu as a mobile worker, you are also able to go on break which pauses your location and means the dispatcher cannot send you additional tasks while on break. Finally, I completed the remaining assignments in the order of priority to get more experience using Workforce for ArcGIS.
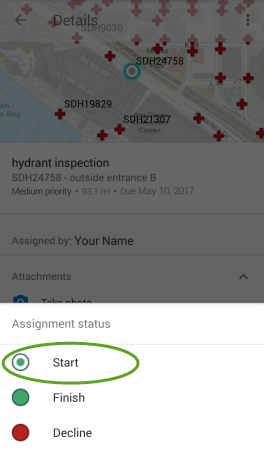
Working on a task
Taking a break

Created and assigned task of medium priority to inspect a hydrant
With this done, the final section of this tutorial was to launch the Workforce for ArcGIS app and complete some of the assignments we had created earlier. Downloading the app to my phone and logging in, I am able to see all of the assignments that I created earlier as well as a map of the area where the tasks are located. Clicking on one of the tasks, I am able to "Start" which allows the dispatcher to see where the workers are and what tasks are getting done. Also on this menu, you can pause the task and create a note to let the dispatcher know why you are pausing the assignment as well as finish the task once it is done. Within the main menu as a mobile worker, you are also able to go on break which pauses your location and means the dispatcher cannot send you additional tasks while on break. Finally, I completed the remaining assignments in the order of priority to get more experience using Workforce for ArcGIS.

Working on a task

Taking a break
Discussion
This tutorial further increased my experience with many of the online resources that ESRI offers. I especially enjoyed this tutorial as I can see this online resource being useful in possible future employment. The versatility and ease of use in working with Workforce for ArcGIS is also interesting as I would like to see what else can be accomplished with such a useful resource.
Conclusion
Overall, this lab exercise and tutorial was a valuable addition to my ArcGIS experience and certainly worth the time spent on such a project. I now have the knowledge of how to both create and complete projects and tasks in Workforce if I was required to do so for a job or future class. By completing this tutorial, I feel confident in putting experience with Workforce for ArcGIS on my resume which will only help me in future employment. Knowing how to navigate and correctly operate this online resource is important in my growth as a geospatial worker and technician.
No comments:
Post a Comment